You don’t really notice a wall until it starts to crack. It might begin as a thin line above a doorway or a small chip behind the couch, something easy to ignore at first. Over time, in the right light, it becomes impossible to miss.
The texture starts to feel uneven, paint does not sit right, and suddenly the whole room feels unfinished. When you patch plaster walls the right way, you are not just hiding damage. You are restoring the surface so it looks and performs like it should.
Key Takeaways
- Proper preparation determines how long repairs will last
- Thin, layered application creates a smooth plaster wall finish
- Reinforcement prevents cracks from returning
- Patience matters more than speed in plaster repair techniques
What It Really Means to Patch Plaster Walls
To patch plaster walls is to repair damaged sections such as cracks, chips, or holes so they blend seamlessly with the surrounding surface while maintaining strength over time.
It’s a mix of technique and timing. Done right, the repair disappears. Done poorly, it shows up again within weeks.
Why Plaster Damage Happens in the First Place
Before jumping into patching plaster walls, it helps to understand why the damage exists:
- Natural settling of the home
- Moisture working its way behind surfaces
- Aging materials in older homes
- Previous poor-quality repairs
Many people focus only on filling the damage, not solving the cause. That’s why repairs fail.
How to Patch Plaster Walls Step by Step
A lasting repair follows a method, not guesswork.
1. Clean and Prepare the Area
Remove loose material and dust. Proper plaster surface preparation steps ensure the patch adheres well.
2. Reinforce Weak Spots
Use mesh tape for plaster cracks, especially in deeper or spreading damage. This step is critical for preventing future cracks.
3. Apply a Bonding Agent
A bonding agent for plaster repair helps new material stick securely to older surfaces, especially when repairing old plaster.
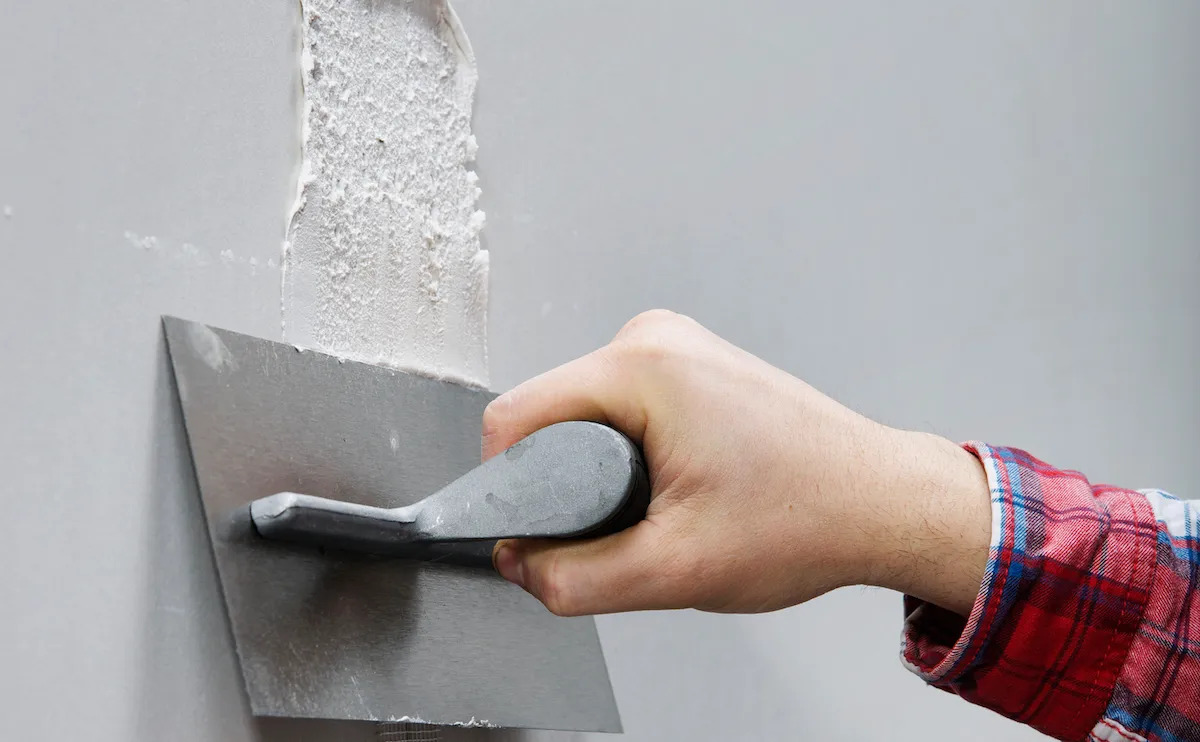
4. Build in Thin Layers
Use a patching compound for plaster walls and apply it gradually. Thick applications often shrink and crack.
5. Smooth and Finish
Focus on sanding and finishing plaster walls carefully. This is where you achieve a seamless look.
The Method That Makes Repairs Last
If you want consistency, follow a simple framework:
The 3-Stage Repair Framework
- Stabilize – Secure and reinforce damaged areas
- Build – Fill and level the surface in layers
- Blend – Smooth and feather edges for an invisible finish
This approach is what separates durable repairs from temporary fixes.
Common Mistakes When Repairing Damaged Plaster Walls
Even with the right tools, small missteps can ruin the result:
- Skipping reinforcement on cracks
- Applying too much compound at once
- Not letting layers fully dry
- Ignoring small cracks that spread later
- Rushing sanding or skipping it entirely
These issues often turn a simple plaster wall patch repair into a recurring problem.
Quick Repair Reference Guide
| Practice | When it helps | Simple cue | Mistake |
| Mesh reinforcement | Deep cracks | Crack widens over time | Skipping support |
| Thin layering | Uneven surfaces | Patch looks bulky | Thick application |
| Gradual sanding | Final finish | Rough texture remains | Over-sanding |
| Skim coating | Blending patches | Visible patch edges | Skipping finish |
Materials Matter More Than You Think
Using the best materials for plaster patching can dramatically improve results:
- Flexible wall crack filler for plaster for minor cracks
- High-quality compounds that resist shrinkage
- Proper tools for plaster wall repair for better control
These choices make the difference between a repair that lasts months and one that lasts years.
A Real-Life Example
A homeowner noticed small cracks forming along a hallway wall. They used a quick filler and painted over it. Within weeks, the cracks returned, slightly larger this time.
Instead of repeating the same mistake, they followed a proper interior plaster repair guide: cleaned the area, reinforced with mesh, applied layered compound, and finished with skim coating after patching.
The result was a smooth, stable surface that held up over time.
A Detail Worth Remembering
As Leonardo da Vinci said:
“Details make perfection, and perfection is not a detail.”
That idea applies directly when you patch plaster walls. Every step matters.
The Overlooked Risk: Moisture
Many assume plaster damage is purely cosmetic, but that’s not always true. Moisture can quietly weaken walls from the inside.
According to the U.S. Environmental Protection Agency, controlling moisture is essential to prevent structural damage and indoor air issues.
Addressing the root cause ensures your repair doesn’t fail again.
Blending the Repair for a Seamless Look
The final step is where skill shows.
To create an invisible repair:
- Feather the edges outward
- Use light pressure when sanding
- Check the surface under different lighting
- Apply a thin skim coat if needed
This is how professionals achieve a smooth plaster wall finish.
When DIY Isn’t Enough
Some situations go beyond basic DIY plaster wall patching:
- Large holes or widespread damage
- Repeated cracking in the same area
- Structural movement or moisture issues
- Lath and plaster wall repair in older homes
In these cases, experienced contractors like In The D Construction, known as a trusted Plaster Repair Expert Detroit MI, can handle more complex repairs with long-term results.
Conclusion
Learning how to patch plaster walls properly isn’t just about fixing what’s broken. It’s about restoring your space so it feels complete again.
The process requires patience, the right materials, and a clear method. When you take the time to do it correctly, the results are lasting, seamless, and worth the effort.
Summary
To patch plaster walls effectively, you need more than a quick fix, you need the right process. From preparation and reinforcement to layering and finishing, each step ensures durability and a smooth appearance. Avoiding common mistakes and using quality materials makes a significant difference. With the right approach, even damaged plaster can be restored to a flawless condition.
FAQs
1. What is the best way to patch plaster walls?
Clean the area, reinforce cracks, apply thin layers of compound, and sand carefully for a smooth finish.
2. Can I patch plaster walls myself?
Yes, small repairs are manageable, but larger or recurring issues may require professional assistance.
3. Why do plaster repairs fail over time?
Most failures happen due to poor preparation, lack of reinforcement, or rushing the process.
4. How do I get a smooth finish on plaster repairs?
Use thin layers, sand gradually, and apply a final skim coat if needed.
5. What tools are needed for plaster wall repair?
Basic tools include a putty knife, sanding block, patching compound, mesh tape, and possibly a bonding agent.